Sunday, July 31, 2011

GUI

A user can interact with a non-batch Repast simulation through the gui. The gui allows the user to start, stop, pause, setup, and exit a simulation through the toolbar. The table below lists the toolbar buttons and their functions.


Start Multi-Run   Step   Initialize      Stop        Pause       Setup         Load Model                                             
                                             
View Settings      Exit  
                 X


Start Multi-Run: The start multi-run button starts a batch run of a simulation. See How to Use the Multi-Run for more details.
Start: The start button starts the simulation when it is paused or has not yet been started, iterating through the scheduled behavior.
Step: The step button starts the simulation when it is paused or has not yet been started, iterating through a single iteration the scheduled behavior.
Initialize: The initialize button starts the simulation but pauses before iterating any scheduled behavior. Only the initializing code is executed in this case.
Stop: The stop button stops the simulation.
Pause: The pause button pauses the simulation.
Setup: The setup button "sets up" the simulation by executing the user defined setup code.
Load Model: The load model button pops up a dialog allowing the user to specify a model to load.
View Settings: The view settings button will display the various model settings panel if it is hidden or destroyed.
Exit: The exit button will shutdown the simulation and exit.


To run a simulation you would click either the start, step or initialize buttons. If you click the initialize button, you would then click step or start. When you want to stop the simulation and then run it again, you click stop and then the setup button.

IN PROCESS

The Proposed Site: PENANG HARITAGE
Ø  TOWN HALL PENANG


a)      History

b)      About Town Hall


c)      Direction And Location
Ø  maps.google.com.my

d)     Contact


1.      Group Name : UNBREAKABLE


2.      Our Blog :
Ø  http://penangheritage-dm1.blogspot.com/

3.      Group Member :

Ø  Karthik Marapan – Leader
Ø  Nurul Fasiha
Ø  Nadia Nadhirah
Ø  Kishen Vighnesh
Ø  Banu

4.       Objective:
Ø  To know about history be hide the Town Hall, which is one of the famous heritage and cultural sites in Malaysia that is located in Pulau Pinang. This also let people around the world not only Malaysian, knowing about the history of the Town hall Penang


5.      Concept:
Ø  Our concept is all about the historical and some information for Town Hall Penang. The main purpose are want to bringing you to get more info for this place and all the related info of Town Hall Penang well to the people to gain interest from them when visit that place.

6.      Division of tasks

Ø  Karthik Marapan - Carpenters Guild
Ø  Nurul Fasiha – Town Hall
Ø  Nadia Nadhirah - Goldsmiths Guild
Ø  Kishen Vighnesh - Fort Cornwallis
Ø  Banu - Blue Mansion


FLOWCHART BY MY INDIVIDUAL SIDE


Thursday, July 21, 2011

E-WALLPAPER


STEP 1


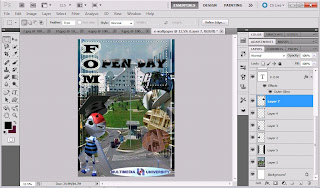
 Open New file name as e-wallpaper and open the entire picture to put inside the Adobe Photoshop. Then paste the first faculty to the wallpaper to be as a background in the e-wallpaper. Then EDIT > Transform > ......the faculty picture as I want it and also use the capacity to lower the colour.


STEP 2


Secondly, I put the entire picture at the e-wallpaper such as the hat, MMU logo and etc..... I use the Magnetic Lasso Tools to cut the image from the picture that I have put it inside the Adobe Photoshope.


STEP 3


 After that, I find another picture to add more inside the e-wallpaper. Then, I would like to put picture of my faculty in the MMU ......same as Step 2, but I use another tools as Elliptical Marquee Tool to edit the picture of faculty I have take.


STEP 4


 I click on the door that I have edited to be the frame for my wallpaper. Edit the door and lower the capacity. Change the colour layer of the door.  I use the Adjustment to play the colour for other image inside the wallpaper. Every image of the faculty I Edit and change the capacity. Click the layer and used quick Selection tool to select every image in the wallpaper. I also use the Auto Tone, Auto Contrast, and Auto Color for the some image. Use the Filter > sharpen or > Stylize .....for some image that I want. Arrange the image and put the side to look it better and structure. Do some retouching skills to enhance my e-wall paper. 


STEP 5


Lastly, I click the Horizontal and Vertical Type Tool the right the text word of FOM OPEN DAY and the Date. Then transform > scale / skew / rotate ... the words make it’s as I want. Change the colour and the style to design the word. Therefore I used text tools to type out the text words.
Then combine and merge the entire layer to be on one image of e-wallpaper. 


FINALLY........

MY E- WALLPAPER


THANK YOU....uhuhuuhuhuhu.......


TUTORIAL 3

PHOTO RETOUCHING


STEP 1


Open the tutorial LAB3 PSD picture.This image will be adjusted with colour of tone and other functionality in Adobe Photoshop.


STEP 2

 Go to the CROP Tools to eliminate unnecessary white background in that image. 


STEP 3

Go to IMAGE > Auto Tone > on Auto Contract and > Auto Colour to adjust the image colour.


STEP 4

Go to IMAGE > Adjustment and go to the Brightness/Contrast for the picture.


STEP 5

 Then go to IMAGE back, and then adjust the Hue and Saturation the picture


STEP 6

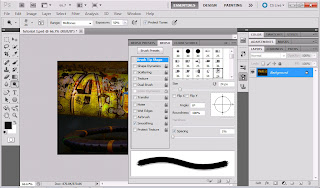
 After that, go to the Dodge tool, used for bright for the specific part of the picture. You can also choose any type of brush size and design.


STEP 7

Lastly, you can use the Gradient Tools and edit more for the picture look darker. Then, you can save the picture. 


FINALLY


THANK YOU..

TUTTORIAL 2

LAYER BASICS


    STEP 1


 Open the file PSD for beach and Pineapple in the tutorial LAB2. Then view as 2 up to show each of it.


STEP 2

Start using the selection tool, firstly you can crop the beach picture using the quick selection tools in the left hand side toolbar. Then drag it’s at the file of pineapple, then go to EDIT > TRANSFORM > you can choose to take SCALE to enlarge or fit the size. You can also choose other method to rotate or skew its.


STEP 3

Under the layer style, choose outer glow,stroke or any tool that can make you edit the beach to be more creative n nice. 


STEP 4

Under picture of pineapple, drag the picture below the symbols between dustbin and picture group. Another way of it. Use the capacity to lower the colour of pineapple. 


STEP 5

Under the layer position, the picture of flower arranges according to the top and following on and resizes it. Edit > Transform > the flower and put it anywhere that you like. Under the layer at the right side, you can change the colour or the brightness


STEP 6

 Under the stamp of postage is arranged on the top under the layer section.  You can repeat the same step as step 5 for editing the postage.


STEP 7


 The font of HAWAI is placed on before the the picture pineapple so the Hawai font can display on the A4 paper. Also you can edit the font of HAWAI as using in STEP 5 AND 6. Dont forget to use the layer tool for editing the picture. Go to > LAYER > show on the STEP 3.


STEP 8

Lastly, merge all the layer and save it as a JPEC picture. 


FINALLY


thank you..

Wednesday, July 20, 2011

TUTORIAL 1

SELECTION TOOLS


step 1

First,open the new file and put the name. After that,under present change to international paper.


step 2

Click the selection_Lab1 for starting doing our task.


step3

Start using the selection tool, firstly you can crop the picture of vegetable by using the magic wizard. The quick selection tools in the left hand side toolbar.


step 4
Then paste it’s at the new file that you have made, go to EDIT > TRANSFORM > you can choose to take SCALE to enlarge or fit the size. You can also choose other method to rotate or skew its.


step 5

 After that, if you want to take others vegetable such as carrot or beans,you can use the Magnetic Lasso Tool (L).  This is easy for you to crop the thing based on the body of the picture. Go to Zoom > (+) or (-) at the up of the tools. You can zoom it for easy you to crop that picture


step 6

Then, copy >CTRL (C) and paste >CTRL (V) its.  Same as STEP 4, you can transform its to be as what you want.  Move the images of carrot and press the ALT button to duplicate the images in that green color board on the left hand side paper.


step 7

You now can use others vegetable picture to design the green board inside the new file and repeat the step from STEP 5 and 6 to continue your tutorial.


step8

If you make a mistake, you can delete or remove its from the history. Beside that you can undo or redo it from the EDIT > UNDO.  


step 9

Finally, lock every layer as you can see from the right side above the layer. Then merge all the layer to save the picture that you have made.


step10


    Save its as under JPEC picture and save it in the in new folder.


FINALLY
Thank you... J

Tuesday, July 19, 2011

PEOPLE SAYS ABOUT TOWN HALL PENANG

This is howTour Malaysia describe its architecture:
"Built in Western architectural style with classical arches, columns, pilasters, quoins, ornamental elements on roof parapet and balustrades, this two-storey building consists of a front portico, an assembly hall, a ballroom with adjoining supper rooms, a performance stage, office rooms and a library. The Old Town Hall was later renovated with its side wing extended and a covered balcony added over the front portico to provide a better view overlooking the sport and recreational activities in the grounds. The building had been extended several times in its history in 1890, 1903, 1938, 1958 and 1991 to accommodate the increasing demand for internal space."


REFERNCE- http://www.tourismpenang.net.my/heritage_town_hall.html
REFERNECE- http://www.igeorgetownpenang.com/igt-photos/places-of-interest/339-penang-old-town-hall-
REFERENCE- http://www.asiaexplorers.com/malaysia/townhall_penang.htm